
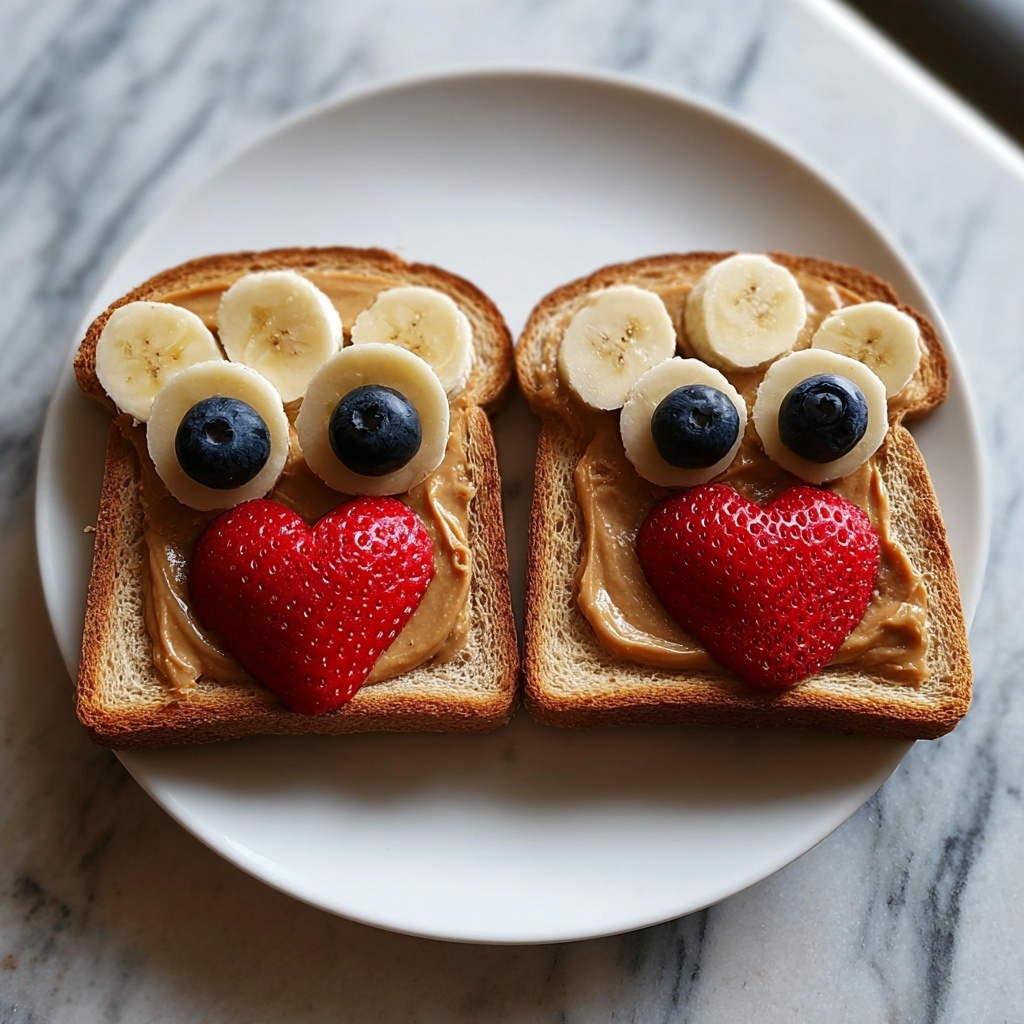
If you are looking for a delightful and simple way to brighten up breakfast or snack time, the Fruity Teddy Bear Toasts Recipe is your new best friend. This charming and playful toast creation combines the creamy richness of peanut butter with the naturally sweet and fresh flavors of banana, blueberries, and strawberry, turning ordinary toast into a fun, edible work of art. It’s a fantastic way to get kids excited about fruit or to bring a smile to anyone’s face with minimal effort but maximum joy.
Ingredients You’ll Need
Gathering your ingredients for this Fruity Teddy Bear Toasts Recipe is incredibly straightforward, yet each element plays a crucial role in the overall flavor and presentation. These carefully selected ingredients come together to create a perfect balance of taste, texture, and vibrant color.
- 2 slices bread (whole wheat or white): Choose your favorite bread type for the perfect crispy base.
- 2 tbsp peanut butter: Smooth or crunchy, this adds a creamy, protein-packed layer that holds your toppings in place.
- 4 banana slices (for ears): Soft, sweet, and easy to shape, bananas make adorable teddy bear ears.
- 2 blueberries (for eyes): Small, juicy, and rich in color, they add a cute pop for the eyes.
- 1 strawberry (sliced for nose and mouth): Bright red and flavorful, strawberry slices artfully create the teddy bear’s nose and mouth.
How to Make Fruity Teddy Bear Toasts Recipe
Step 1: Toast the Bread
Start by toasting your bread slices until they reach a lovely golden brown color. This ensures a crunchy texture that contrasts wonderfully with the soft toppings and keeps the toast from getting soggy too quickly.
Step 2: Spread the Peanut Butter
Next, take that perfect toast and spread a generous, even layer of peanut butter over each slice. The creamy peanut butter not only adds richness and a nutty flavor but also acts as an edible glue to hold your fruity accessories in place.
Step 3: Assemble the Teddy Bear Face
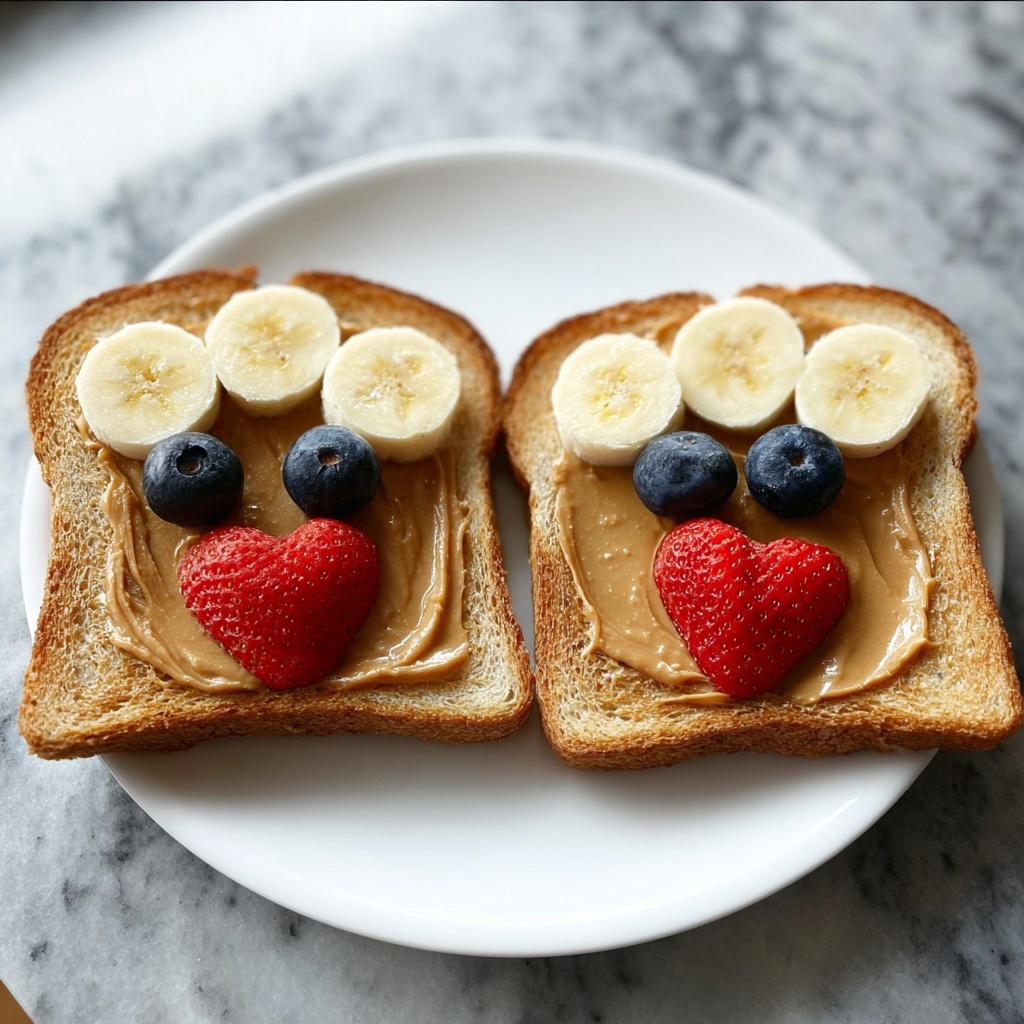
Here comes the fun part! Arrange the banana slices at the top of each toast to create your teddy bears’ ears. Then place the blueberries carefully to form the eyes. Finally, add sliced strawberry pieces to craft an adorable nose and mouth. Get creative with the arrangement—you’re making your own little breakfast buddies!
Step 4: Serve Immediately
Once your fruity teddy bears are assembled, serve these delightful toasts immediately to enjoy their freshness and crunchy-soft texture combo. They’re perfect for a cheerful start to your day or a playful snack any time.
How to Serve Fruity Teddy Bear Toasts Recipe
Garnishes
To elevate the presentation, consider lightly dusting your Fruity Teddy Bear Toasts Recipe with a pinch of cinnamon or powdered sugar. You can also add a few fresh mint leaves nearby for a refreshing aroma and a splash of green that really makes the colors pop.
Side Dishes
Pair these adorable toasts with a side of fresh yogurt or a small bowl of mixed berries for an extra nutrient boost. A glass of cold milk or freshly squeezed orange juice rounds out the meal perfectly, making it balanced, healthy, and oh-so-tasty.
Creative Ways to Present
If you’re hosting a brunch or serving this treat to kids, arrange the Fruity Teddy Bear Toasts Recipe on a bright, whimsical plate, maybe with some small fruit bowls on the side to encourage customization. You can also use cookie cutters to shape the bread before toasting, adding another layer of fun and creativity.
Make Ahead and Storage
Storing Leftovers
If you happen to have leftovers (which might be rare!), cover the Fruity Teddy Bear Toasts Recipe tightly with plastic wrap and keep them in the refrigerator. However, be aware the toast might lose its crunchiness, and the fresh fruit may release some moisture.
Freezing
Freezing is not recommended for this recipe because the fresh fruit toppings and peanut butter texture won’t hold up well after thawing. The best approach is to prepare the toast fresh to enjoy the optimal taste and look.
Reheating
Since you want to keep the toast crispy and the fruit fresh, reheating is generally not advised. If you need to refresh the bread base, toast a new slice and add fresh peanut butter and fruit anew for the best Fruity Teddy Bear Toasts Recipe experience.
FAQs
Can I use other nut butters instead of peanut butter?
Absolutely! Almond butter, cashew butter, or even sunflower seed butter work wonderfully and offer different nutty nuances, making the Fruity Teddy Bear Toasts Recipe customizable to any preference or allergy requirement.
How can I make this recipe vegan-friendly?
This recipe is naturally vegan as long as you choose a bread that contains no animal products and a plant-based nut butter. The fruits are all vegan, making it a perfect choice for a plant-based snack or breakfast.
Are there suggestions for making this recipe nut-free?
If nuts are off-limits, try using a seed butter like sunflower seed butter or soy butter instead. They maintain the creamy texture and flavor necessary to keep the fruity teddy bear faces intact and delicious.
What age group is the Fruity Teddy Bear Toasts Recipe suitable for?
This recipe is ideal for kids and adults alike. Just be mindful of choking hazards when serving to very young children and cut the fruit into smaller pieces if needed.
Can I add other fruits to the Fruity Teddy Bear Toasts Recipe?
Yes! Feel free to get creative by adding thin apple slices, raspberries, or even kiwi for unique colors and flavors while still maintaining that charming teddy bear vibe.
Final Thoughts
If you want to bring a little extra joy to your table with a recipe that’s as fun to make as it is to eat, you must try this Fruity Teddy Bear Toasts Recipe. Its simplicity, sweetness, and adorable presentation make it a true standout for breakfast or snack time. Grab your ingredients, gather your loved ones, and watch as these tasty little bears brighten your day!
Print
Fruity Teddy Bear Toasts Recipe
- Prep Time: 5 minutes
- Cook Time: 5 minutes
- Total Time: 15 minutes
- Yield: 2 servings
- Category: Breakfast
- Method: Toasting
- Cuisine: American
- Diet: Vegetarian
Description
Delight your little ones with these fun and healthy Fruity Teddy Bear Toasts. This quick and easy recipe transforms simple toast into adorable bear faces using fresh fruit and peanut butter, perfect for a nutritious breakfast or snack in just 15 minutes.
Ingredients
Bread and Spreads
- 2 slices bread (whole wheat or white)
- 2 tbsp peanut butter
Fruit Decorations
- 4 banana slices (for ears)
- 2 blueberries (for eyes)
- 1 strawberry, sliced (for nose and mouth)
Instructions
- Toast the bread: Toast the bread slices until they turn golden brown and slightly crisp to provide a sturdy base for the toppings.
- Spread peanut butter: Evenly spread 1 tablespoon of peanut butter on each slice of toasted bread, creating a delicious and sticky surface to hold the fruit in place.
- Decorate with fruit: Arrange the banana slices at the top of each toast to mimic bear ears. Place the blueberries as eyes directly below the ears, and carefully position the strawberry slices to form the nose and mouth area, giving a cute teddy bear face.
- Serve immediately: Serve the fruity teddy bear toasts right away to enjoy the crisp toast and fresh fruit at their best.
Notes
- Use fresh fruit for the best taste and texture.
- Substitute peanut butter with almond or sunflower butter for allergy considerations.
- To make it vegan, choose bread without dairy, and use a plant-based spread.
- For extra fun, add raisins or mini chocolate chips for eyes or noses.
- Serve immediately to prevent the toast from becoming soggy.


