
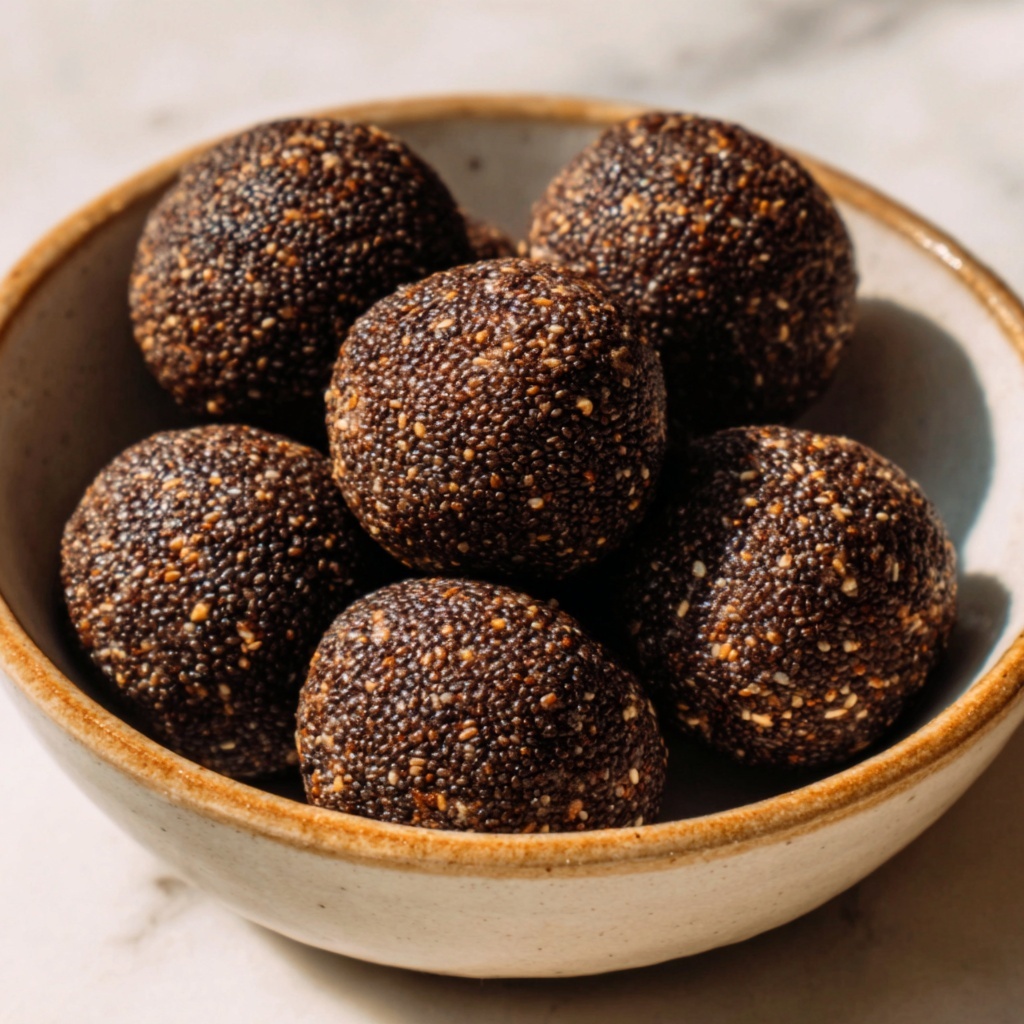
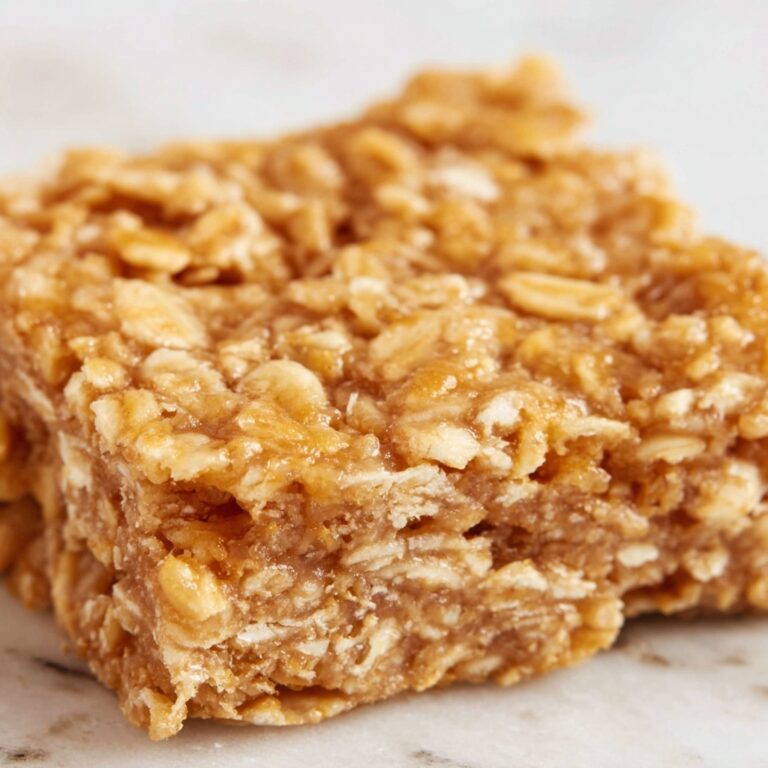
If you are craving a delicious treat that is both satisfying and nourishing, the Wholesome Chocolate Bliss Balls Recipe is your new best friend in the kitchen. These bite-sized gems combine the rich flavors of cocoa and nut butter with the natural sweetness of maple syrup, wrapped around wholesome oats and chia seeds for a delightful texture. Not only do they taste incredible, but they also pack a nutritious punch making them an ideal snack to keep you energized throughout the day or a guilt-free indulgence anytime. Prepare yourself for an easy, no-bake recipe that feels like a little celebration in every bite.
Ingredients You’ll Need
The beauty of the Wholesome Chocolate Bliss Balls Recipe is how simple and accessible the ingredients are. Each one plays its own vital role, from creating the perfect chewy texture to infusing rich chocolate flavor and natural sweetness. With these essentials on hand, you’re just minutes away from your next favorite snack.
- Rolled oats: The base that adds heartiness and binds the ingredients with natural fiber and chew.
- Natural peanut butter or almond butter: Provides creaminess, protein, and a subtle nutty flavor that complements the chocolate.
- Pure maple syrup or honey: A natural sweetener that keeps the bliss balls pleasantly sweet without any processed sugars.
- Unsweetened cocoa powder: Delivers rich chocolate depth and antioxidants without added fat.
- Chia seeds or ground flaxseed: Adds crunch, fiber, and essential omega-3 fatty acids for extra nutrition.
- Mini dark chocolate chips: Little bursts of chocolatey delight that make every bite more indulgent.
- Vanilla extract: Enhances the overall flavor profile with its warm, aromatic notes.
- Pinch of salt: Balances all the sweetness and intensifies the chocolate taste beautifully.
How to Make Wholesome Chocolate Bliss Balls Recipe
Step 1: Break Down the Oats
Start by adding the rolled oats to your food processor. Pulse them a few times until they’re a bit broken down, but not turned into flour—this gives your bliss balls a wonderful rustic texture with just the right amount of bite. This step is key to helping the ingredients stick together perfectly without losing that satisfying chewiness.
Step 2: Add the Wet and Dry Ingredients
Next, add the natural peanut butter or almond butter, pure maple syrup, unsweetened cocoa powder, chia seeds, mini dark chocolate chips, vanilla extract, and the pinch of salt to the oats in the food processor. Process everything until the mixture becomes well combined and sticky, scraping down the sides as needed to ensure every bit is incorporated evenly.
Step 3: Shape Your Bliss Balls
Once your mixture is combined and deliciously chocolatey, scoop out tablespoon-sized portions. Roll each portion with your hands into a firm ball. This hands-on step lets you connect with the process and gives each bliss ball a lovely round shape that’s perfect to pop into your mouth or pack for a quick snack.
Step 4: Chill and Set
Place the shaped bliss balls on a plate or baking sheet and refrigerate for at least 30 minutes. This chilling period helps firm them up so they hold their shape beautifully and have just the right texture. You can enjoy them straight from the fridge or grab them later for a quick energy boost.
How to Serve Wholesome Chocolate Bliss Balls Recipe

Garnishes
To elevate your Wholesome Chocolate Bliss Balls Recipe even further, sprinkle a dusting of extra cocoa powder, shredded coconut, or crushed nuts on top before serving. These simple garnishes add a nice visual contrast and an extra layer of flavor and texture that makes the bliss balls look as good as they taste.
Side Dishes
These bliss balls complement a variety of accompaniments beautifully. Pair them with a fresh fruit salad for a refreshing balance, a glass of almond milk for creamy comfort, or even alongside a yogurt parfait to make breakfast or snack time extra special and wholesome.
Creative Ways to Present
For a party or a fun gift, arrange your bliss balls in decorative cupcake liners or stack them in a clear jar layered with nuts and dried fruit. You can also skewer a few on cocktail sticks for a charming bite-sized dessert tray. These thoughtful touches turn a simple treat into a crowd-pleaser everyone will admire.
Make Ahead and Storage
Storing Leftovers
If you happen to have leftovers (which is rare!), store your chocolate bliss balls in an airtight container in the refrigerator. They will keep fresh and perfect for up to one week, making them an easy grab-and-go snack throughout the week.
Freezing
Want to keep them even longer? Wholesome Chocolate Bliss Balls Recipe freezes wonderfully. Simply place them in a freezer-safe container or bag, and they’ll last for up to three months. When you’re ready to indulge, just thaw in the refrigerator for a few hours or enjoy them frozen for a refreshing treat.
Reheating
Since these are no-bake and served chilled, reheating isn’t necessary. If desired, you can bring them to room temperature for a softer texture, but most people love the cool, firm bite straight from the fridge.
FAQs
Can I use other nut butters instead of peanut or almond?
Absolutely! Sunflower seed butter works great as a nut-free option, and cashew or hazelnut butter can add unique flavors that pair beautifully with chocolate. Just choose natural, unsweetened versions for best results.
What if I don’t have a food processor?
You can use a high-powered blender or even mix by hand with some effort. For the best texture, pulse the oats first, then mix all ingredients thoroughly in a bowl until you have a sticky, cohesive dough.
Are these bliss balls suitable for vegans?
Yes, they are perfect for vegans as long as you use maple syrup instead of honey. All other ingredients are plant-based, making this a wholesome vegan snack.
How sweet are these bliss balls?
They have a gentle natural sweetness from the maple syrup or honey, balanced by the bitterness of cocoa and a pinch of salt. You can adjust sweetness by adding a bit more syrup if you prefer a sweeter treat.
Can I add extras like dried fruit or nuts?
Definitely! Feel free to mix in chopped dried fruits, shredded coconut, or chopped nuts to customize the texture and flavor to your liking. Just keep overall proportions similar for the mixture to bind well.
Final Thoughts
I truly believe the Wholesome Chocolate Bliss Balls Recipe is one of those little kitchen treasures that makes healthy snacking exciting and enjoyable. It’s quick to make, filled with wholesome ingredients, and most importantly, delicious. Whether you need a midday pick-me-up or a simple homemade gift, these chocolate bliss balls will quickly become a staple you reach for again and again. Give them a try—you might just fall in love at first bite!
Print
Wholesome Chocolate Bliss Balls Recipe
- Prep Time: 15 minutes
- Cook Time: 0 minutes
- Total Time: 15 minutes plus 30 minutes chilling
- Yield: 14 bliss balls
- Category: Snack
- Method: No-Cook
- Cuisine: International
- Diet: Vegetarian
Description
Delicious and wholesome chocolate bliss balls made with oats, natural nut butter, cocoa, and a touch of sweetness. These no-bake energy bites are perfect as a healthy snack or quick treat, requiring minimal prep and refrigeration to set.
Ingredients
Ingredients
- 1 cup rolled oats
- 1/2 cup natural peanut butter or almond butter
- 1/3 cup pure maple syrup or honey
- 1/4 cup unsweetened cocoa powder
- 2 tablespoons chia seeds or ground flaxseed
- 1/4 cup mini dark chocolate chips
- 1 teaspoon vanilla extract
- pinch of salt
Instructions
- Prepare oats: Add the rolled oats to a food processor and pulse a few times until they are slightly broken down but not ground into flour. This helps create a better texture for the bliss balls.
- Combine ingredients: Add the peanut butter, maple syrup, cocoa powder, chia seeds, chocolate chips, vanilla extract, and a pinch of salt to the oats in the processor. Process until the mixture is well combined, sticky, and cohesive. Scrape down the sides as needed to ensure everything is mixed evenly.
- Form balls: Scoop tablespoon-sized portions of the mixture and roll them between your hands to form smooth, round balls.
- Chill: Place the formed bliss balls on a plate or baking sheet and refrigerate for at least 30 minutes to allow them to firm up properly before serving.
Notes
- If the mixture feels too dry, add 1 to 2 teaspoons of water or extra maple syrup to reach desired consistency.
- For a nut-free option, substitute peanut or almond butter with sunflower seed butter.
- Store bliss balls in an airtight container in the refrigerator for up to one week to maintain freshness.

