
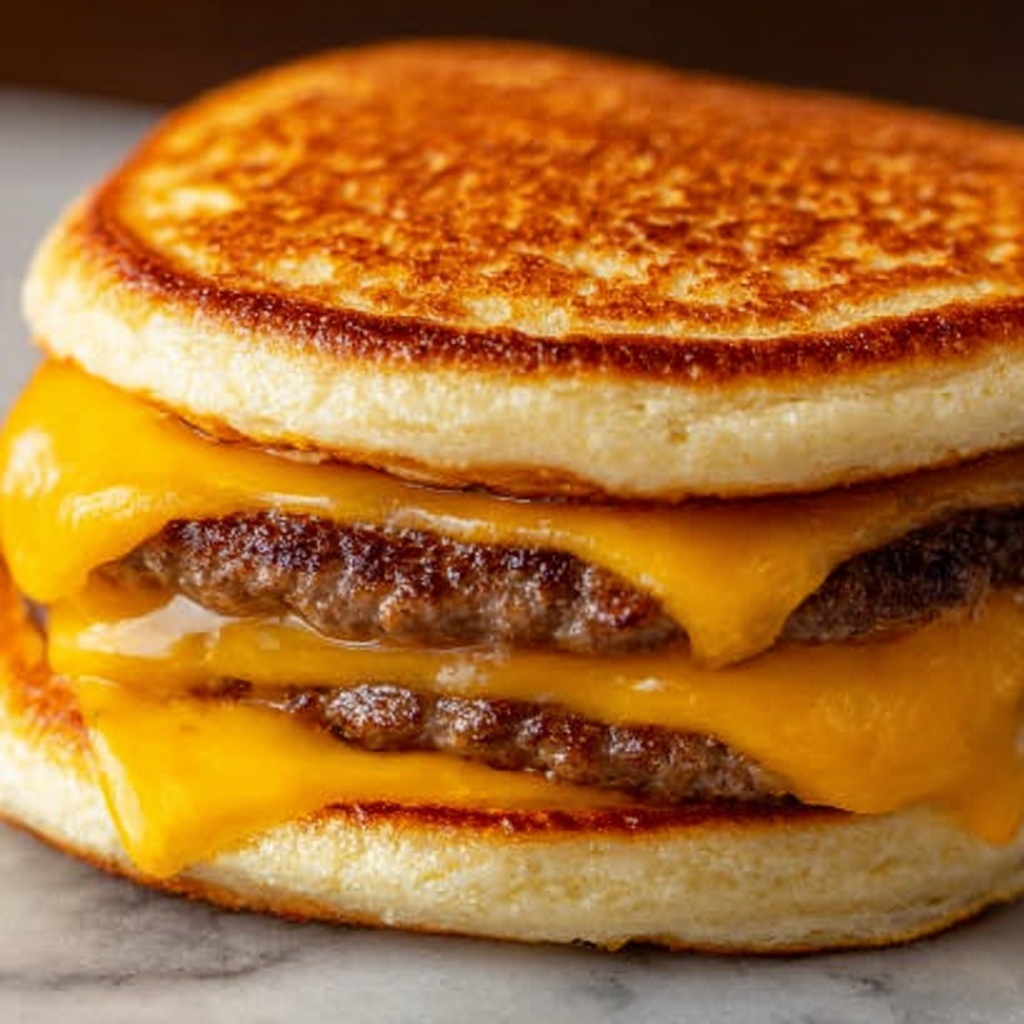
If you’re anything like me, mornings can be a whirlwind, and finding a quick yet satisfying breakfast feels like a luxury. Enter the Frozen Breakfast Sandwiches: Quick and Delicious Morning Solutions Recipe, a game changer for busy days. These sandwiches blend fluffy eggs, melty cheese, vibrant bell peppers, and savory ham or bacon, all nestled between English muffins. They’re easy to prepare ahead and freeze, then warm up in minutes for a delicious start that feels homemade. Trust me, once you try this recipe, it’ll become your go-to for speedy mornings without sacrificing flavor or heartiness.
Ingredients You’ll Need
This recipe keeps things wonderfully simple, using ingredients that you might already have in your fridge or pantry. Each one plays a crucial role: eggs for a protein-packed base, milk to make the eggs silky and light, cheese and peppers for color and melty texture, plus savory meat options for that satisfying breakfast punch.
- 8 large eggs: The foundation of the sandwich, providing fluffy, protein-rich goodness.
- 1 cup milk: Adds creaminess to the eggs, making them tender and moist.
- 1 cup shredded cheese (cheddar or your choice): Melts perfectly, adding rich flavor and gooey texture.
- 1 cup diced bell peppers (any color): Brightens each bite with crunch and sweetness.
- 1 cup diced cooked ham or cooked sausage (optional): Brings savory depth and extra heartiness.
- 1 teaspoon salt: Balances and enhances all the flavors.
- 1/2 teaspoon black pepper: Adds a gentle kick and warmth.
- 8 English muffins, split in half: Toasty and sturdy, they hold everything together perfectly.
- 8 slices of cooked bacon (optional): Crispy, smoky, and irresistible.
- Butter or cooking spray for greasing: Prevents sticking and adds a subtle buttery touch.
How to Make Frozen Breakfast Sandwiches: Quick and Delicious Morning Solutions Recipe
Step 1: Whisk Your Base
Start by cracking all 8 eggs into a large mixing bowl, being careful to avoid shell bits. Add the milk next – this step is key to getting the eggs fluffy and creamy. Whisk the mixture until it’s smooth and a uniform pale yellow color with no streaks of white.
Step 2: Mix in the Flavor Boosters
Stir in shredded cheese and diced bell peppers for that perfect balance of melty texture and freshness. If you’re opting for meat, diced ham or cooked sausage adds a satisfyingly savory touch. Don’t forget to season with salt and black pepper to enhance every bite.
Step 3: Prepare the Baking Dish
Preheat your oven to 350 degrees Fahrenheit. Grease a 9×13 inch baking dish generously with butter or cooking spray – this keeps everything from sticking and makes cleaning easier later.
Step 4: Bake to Perfection
Pour the egg mixture evenly into the prepared dish. Slide it into the oven and bake for 25 to 30 minutes. You’ll know it’s ready when the eggs are fully set and the top has a lovely light golden color.
Step 5: Cool and Slice
Once out of the oven, allow the egg mixture to cool for about 10 minutes. This step is important for neat slicing. Meanwhile, if you like, toast your English muffin halves lightly to add a bit of crunch to the sandwich.
Step 6: Assemble Your Sandwiches
Cut the cooled egg bake into eight equal squares. Place a square on one half of each English muffin, add a slice of crispy bacon if using, then top with the remaining muffin halves. Wrap each sandwich individually with plastic wrap or foil to protect freshness.
Step 7: Freeze for Easy Mornings
Put the wrapped sandwiches into a large freezer-safe bag or container. Be sure to label it with the date so you know how fresh your breakfast soldiers are. These sandwiches can be stored for up to two months – that’s nearly two months of hassle-free mornings!
How to Serve Frozen Breakfast Sandwiches: Quick and Delicious Morning Solutions Recipe

Garnishes
When serving, fresh garnishes can elevate the experience. A sprinkle of chopped fresh chives or a dash of hot sauce adds brightness and a little zing to complement the savory richness of the sandwich.
Side Dishes
Pair these sandwiches with a crisp, refreshing side like a fruit salad or some lightly dressed greens to balance the richness. A cup of your favorite coffee or fresh orange juice also makes a perfect morning companion.
Creative Ways to Present
Make breakfast feel special by serving these sandwiches on colorful plates or stacking them on a platter for a casual brunch spread. Wrapping them in parchment paper tied with twine is a charming way to offer them as grab-and-go treats for guests or family members.
Make Ahead and Storage
Storing Leftovers
After assembling your sandwiches, wrapping them individually is essential for preserving flavor and preventing freezer burn. Store leftovers in a tightly sealed container or freezer bag to keep them fresh until you’re ready to enjoy.
Freezing
This recipe shines because of its freezer-friendly nature. Once wrapped and bagged, place all sandwiches flat in the freezer. They’ll keep their best quality for up to two months, providing you with quick breakfasts that taste freshly made.
Reheating
For a quick option, unwrap your sandwich and microwave it on high for 1 to 2 minutes, covering it with a damp paper towel to retain moisture. If you prefer a crispy finish, reheat in a 350-degree oven or toaster oven for 10 to 15 minutes. This helps restore a toasty exterior that makes every bite delightful.
FAQs
Can I customize the fillings in this recipe?
Absolutely! This recipe is very flexible. You can swap bell peppers for spinach or mushrooms, change the cheese, or leave out the meat for a vegetarian version. It’s all about making it your own favorite morning treat.
How long can I store these sandwiches in the freezer?
Properly wrapped, these sandwiches will stay flavorful and safe to eat for up to two months in the freezer. Beyond that, they might lose some texture and taste, but they’ll still be edible.
Is it possible to make this recipe dairy-free?
Yes, you can substitute the milk with a dairy-free alternative like almond or oat milk, and choose a dairy-free cheese. The flavor and texture might vary slightly, but it will still be delicious!
Can I prepare these sandwiches without English muffins?
Definitely! While English muffins are ideal for their texture and shape, you can use bagels, croissants, or even sandwich thins. Just make sure they hold up well when frozen and reheated.
What’s the best way to reheat if I’m in a hurry?
Microwaving is your fastest option—1 to 2 minutes covered with a damp paper towel will warm it through nicely. If you have a couple more minutes, the toaster oven or regular oven will give you that crisp finish everyone loves.
Final Thoughts
If you want a breakfast that’s both effortless and satisfying, give the Frozen Breakfast Sandwiches: Quick and Delicious Morning Solutions Recipe a try. It truly transforms busy mornings into moments of joy with every bite. Plus, knowing you have a stash of these ready to go means you’re one step ahead every single day. So go ahead, make a batch, freeze ‘em, and thank yourself later for making mornings simpler and tastier!
Print
Frozen Breakfast Sandwiches: Quick and Delicious Morning Solutions Recipe
- Prep Time: 15 minutes
- Cook Time: 30 minutes
- Total Time: 45 minutes
- Yield: 8 sandwiches
- Category: Breakfast
- Method: Baking
- Cuisine: American
- Diet: Low Salt
Description
These Frozen Breakfast Sandwiches are a quick and delicious morning solution, perfect for busy weekdays. Made with fluffy baked eggs, cheese, bell peppers, and optional ham or sausage, all sandwiched between toasted English muffins and optional bacon, these sandwiches can be prepared in advance, frozen, and reheated easily for a nutritious and satisfying breakfast on the go.
Ingredients
Egg Mixture
- 8 large eggs
- 1 cup milk
- 1 cup shredded cheese (cheddar or your choice)
- 1 cup diced bell peppers (any color)
- 1 cup diced cooked ham or cooked sausage (optional)
- 1 teaspoon salt
- 1/2 teaspoon black pepper
Assembly
- 8 English muffins, split in half
- 8 slices of cooked bacon (optional)
- Butter or cooking spray for greasing
Instructions
- Prepare eggs: In a large mixing bowl, crack the 8 large eggs, checking carefully for any shell fragments.
- Add milk: Pour in 1 cup of milk to make the eggs fluffy and creamy.
- Whisk mixture: Whisk eggs and milk together until the mixture is smooth and uniformly yellow with no streaks of egg whites.
- Mix in ingredients: Stir in 1 cup shredded cheese, 1 cup diced bell peppers, and if desired, 1 cup diced cooked ham or sausage.
- Season: Add 1 teaspoon salt and 1/2 teaspoon black pepper; adjust to taste.
- Preheat oven: Set your oven to 350°F (175°C) to prepare for baking.
- Grease baking dish: Lightly butter or spray a 9×13 inch baking dish to prevent sticking.
- Pour egg mixture: Evenly spread the egg mixture into the prepared baking dish.
- Bake: Bake for 25-30 minutes until eggs are fully set and the top is lightly golden.
- Cool: Remove the dish from the oven and cool for about 10 minutes.
- Prepare muffins: While cooling, toast English muffins lightly if preferred for extra crunch.
- Cut egg squares: After cooling, cut the baked egg mixture into 8 equal squares.
- Assemble sandwiches: Place one egg square on each muffin half; add a slice of cooked bacon if using.
- Complete sandwich: Top with the other muffin half to form each sandwich.
- Wrap sandwiches: Individually wrap each sandwich in plastic wrap or aluminum foil.
- Store: Place wrapped sandwiches in a labeled freezer-safe bag or container; freeze up to 2 months.
- Reheat from frozen: When ready to eat, unwrap and microwave on high for 1-2 minutes covered with a damp paper towel, or reheat in a 350°F (175°C) oven for 10-15 minutes, or use a toaster oven at 350°F for about 10 minutes for crispier texture.
Notes
- For meat-free option, omit ham/sausage and bacon to keep it vegetarian.
- Customize veggies by adding onions or spinach for variety.
- Use gluten-free English muffins to make it gluten-free.
- Ensure sandwiches are cooled completely before freezing for best texture.
- Reheat thoroughly to an internal temperature of 165°F (74°C) for food safety.


