
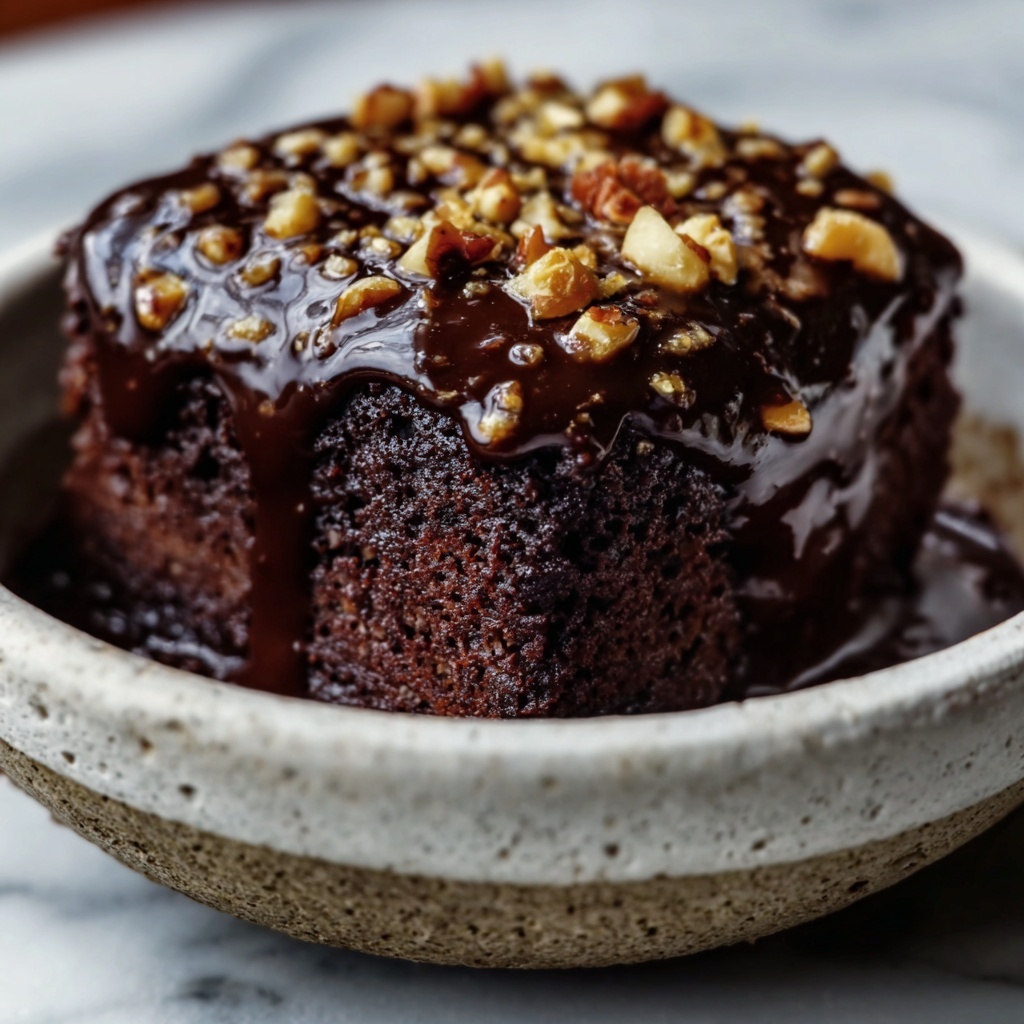
If you’re craving an indulgently rich dessert that comes together in a flash, this Flourless Chocolate Mug Brownie Recipe is exactly what you need. It’s the perfect sweet treat when time and ingredients are limited yet satisfaction is non-negotiable. With simple pantry staples transforming into a fudgy, deeply chocolatey brownie right in your mug, this recipe delivers that homemade comfort without the fuss or flour. Trust me, once you try it, it’ll become your go-to whenever a chocolate craving strikes.
Ingredients You’ll Need
The beauty of this Flourless Chocolate Mug Brownie Recipe lies in its simplicity and how each ingredient contributes to its luscious texture and flavor. These essentials come together perfectly to create a dense, moist brownie that’s bursting with chocolate goodness.
- Unsweetened cocoa powder: Provides the rich, intense chocolate flavor that’s the heart of the brownie.
- Granulated sugar: Balances the bitterness of the cocoa and adds just the right amount of sweetness.
- Milk or dairy-free milk: Adds moisture and helps create a smooth batter; you can customize this based on your dietary preferences.
- Vegetable oil or melted butter: Keeps the brownie tender and moist with its fat content.
- Vanilla extract: Elevates the chocolate flavor with a subtle, fragrant hint.
- Pinch of salt: Enhances all the other flavors, making the chocolate pop.
- Baking powder (optional): Gives the brownie a lighter, slightly fluffier texture if you prefer a bit of lift.
- Chocolate chips (optional): Add gooey pockets of melty chocolate for an extra decadent touch.
How to Make Flourless Chocolate Mug Brownie Recipe
Step 1: Mix Your Ingredients
Start by grabbing a microwave-safe mug that’s at least 12 ounces to avoid spillovers. Combine the unsweetened cocoa powder, granulated sugar, milk, vegetable oil, vanilla extract, salt, and the optional baking powder right in the mug. Whisk these together thoroughly until you achieve a smooth, uniform batter with no lumps. This step is crucial because the smoothness of your batter will directly impact the brownie’s texture.
Step 2: Add Chocolate Chips
If you love chocolate as much as I do, fold in the chocolate chips now. This little addition adds pockets of melty delight inside your brownie, elevating the treat from simple to spectacular. It’s an optional step but one I heartily recommend for maximum indulgence.
Step 3: Microwave to Perfection
Place your mug in the microwave and cook on high for 1 minute to 1 minute 30 seconds. The exact time depends on your microwave’s wattage. You’re looking for the brownie to be set around the edges and just slightly soft in the center—this ensures a fudgy, almost molten texture that’s utterly satisfying.
Step 4: Cool and Enjoy
Allow your brownie to cool for a couple of minutes before digging in. This pause helps the brownie firm up just enough, making it easier to eat and intensifying the chocolate flavor. Top it with your favorite extras or enjoy it as is for a quick, heartwarming dessert.
How to Serve Flourless Chocolate Mug Brownie Recipe

Garnishes
To take your Flourless Chocolate Mug Brownie Recipe to the next level, try garnishing with a scoop of vanilla ice cream, a dollop of whipped cream, or a drizzle of chocolate or caramel sauce. Fresh berries or a sprinkle of powdered sugar can also add a lovely contrast in flavor and presentation.
Side Dishes
This mug brownie pairs wonderfully with light sides like fresh fruit or a small salad with tangy citrus dressing to balance its rich sweetness. A cup of coffee or tea on the side also complements the flavors beautifully and rounds out the experience.
Creative Ways to Present
For special occasions or just to make your treat feel extra fancy, serve the brownie in a clear glass mug so its layers of chocolate chips and fudgy texture can be seen. You might also try topping with crushed nuts or edible gold dust for a bit of sparkle. No matter how you present it, this brownie always steals the show.
Make Ahead and Storage
Storing Leftovers
If you happen to have any leftovers, store the mug brownie in an airtight container at room temperature for up to 2 days. Because it’s flourless and moist, it’s best enjoyed fresh but can hold up well for a short time without drying out.
Freezing
Freezing individual mug brownies isn’t highly recommended as the texture might change upon thawing, becoming a bit denser or crumbly. However, if you do freeze it tightly wrapped, thaw it completely at room temperature before reheating gently.
Reheating
To reheat, pop the brownie back in the microwave for about 15 to 20 seconds. This warms the chocolate back up and restores that soft, gooey texture we all crave. Just be careful not to overheat or it can get rubbery.
FAQs
Can I use gluten-free baking powder in this recipe?
Definitely! Using gluten-free baking powder is a great option if you want to ensure your mug brownie is completely gluten-free. It won’t affect the texture or flavor negatively, so feel free to swap it in.
What milk alternatives work best in this recipe?
Almond, soy, oat, or coconut milk are all fantastic choices and work just as well as dairy milk. Choose your favorite dairy-free milk to keep things vegan or just to switch things up a bit.
Is the baking powder really necessary?
Baking powder is optional in this Flourless Chocolate Mug Brownie Recipe. It helps create a slightly fluffier texture. If you prefer a denser, fudgier brownie, leaving it out delivers that chewy, almost molten center.
How can I make this recipe larger for multiple servings?
Because it’s designed for a single-serving mug, you can multiply the ingredients and bake in a microwave-safe bowl or small baking dish, adjusting cooking time accordingly. Just keep an eye on it to avoid overcooking.
Can I add nuts or other mix-ins?
Absolutely! Chopped walnuts, pecans, or even shredded coconut can add lovely texture and flavor to this brownie. Just fold them in along with the chocolate chips if using.
Final Thoughts
This Flourless Chocolate Mug Brownie Recipe is the perfect little indulgence for chocolate lovers who want big flavor fast. It’s easy, versatile, and deeply satisfying, making it a steadfast favorite in my kitchen. Go ahead, try it today—you’ll be amazed at how a few simple ingredients can bring so much joy straight from your microwave mug to your heart.
Print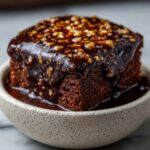
Flourless Chocolate Mug Brownie Recipe
- Prep Time: 2 minutes
- Cook Time: 1 minute 30 seconds
- Total Time: 3 minutes 30 seconds
- Yield: 1 serving
- Category: Dessert
- Method: Microwave
- Cuisine: American
- Diet: Gluten Free
Description
This Flourless Chocolate Mug Brownie is a quick and easy single-serving dessert that can be whipped up in just minutes. Perfect for satisfying your chocolate cravings without the need for flour, this mug brownie uses simple pantry ingredients and cooks right in your microwave for a gooey, rich treat. Optional chocolate chips add an extra layer of indulgence, and it’s ready to enjoy as is or topped with your favorite ice cream or whipped cream.
Ingredients
Dry Ingredients
- 2 tablespoons unsweetened cocoa powder
- 2 tablespoons granulated sugar
- Pinch of salt
- 1/4 teaspoon baking powder (optional, for a slightly fluffier texture)
Wet Ingredients
- 2 tablespoons milk (or dairy-free milk)
- 2 tablespoons vegetable oil (or melted butter)
- 1/4 teaspoon vanilla extract
Optional Add-ins
- 2 tablespoons chocolate chips (optional, for extra gooeyness)
Instructions
- Mix Dry Ingredients: In a microwave-safe mug (at least 12 oz), whisk together the cocoa powder, sugar, salt, and baking powder if using. This creates the base of your brownie and ensures even distribution of the raising agent.
- Add Wet Ingredients: Pour in the milk, vegetable oil, and vanilla extract into the mug. Stir the mixture well until it becomes smooth and combined with no lumps.
- Incorporate Chocolate Chips: If you prefer extra gooeyness, fold in the chocolate chips gently into the batter to distribute them evenly throughout.
- Microwave Cooking: Place the mug in the microwave and cook on high power for 1 minute to 1 minute 30 seconds. The brownie is done when it has set on the top but remains slightly soft in the center for a fudgy texture. Cooking time may vary slightly depending on your microwave’s wattage.
- Cool and Serve: Allow the brownie to cool for a couple of minutes before eating to let it set further. Top with ice cream, whipped cream, or chocolate syrup as desired for extra indulgence.
Notes
- Use a microwave-safe mug that can hold at least 12 ounces to prevent overflow while cooking.
- Adjust cooking time based on your microwave’s wattage; start with 1 minute and add more time in 10-second increments if needed.
- For a dairy-free option, substitute milk with almond, soy, or oat milk and use vegetable oil instead of butter.
- The optional baking powder adds a slight fluffiness; omit for a denser brownie.
- Serve immediately for best texture as the brownie can dry out if left too long.


