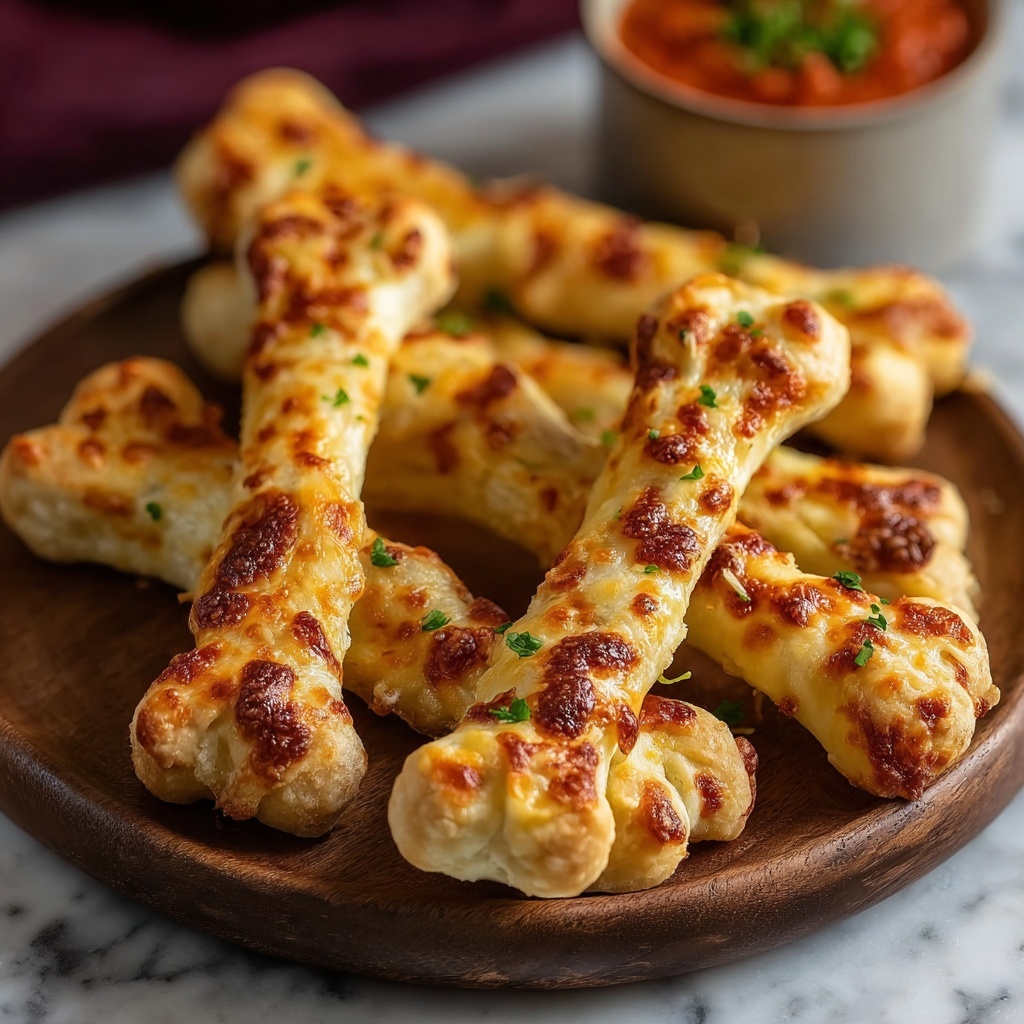
If you’re looking to add a fun and delicious twist to your Halloween spread, this Cheesy Halloween Breadstick Bones Recipe is an absolute must-try. These breadsticks bring together gooey mozzarella and sharp Parmesan cheese wrapped in soft, golden dough shaped like spooky bones, making them both a crowd-pleaser and a fantastic conversation starter. The combination of melty cheese and buttery dough creates a perfect balance of flavors and textures that kids and adults alike will gobble up. Whether you’re hosting a party or just want a festive snack, this recipe delivers on taste and creativity every time.
Ingredients You’ll Need
Don’t let the simplicity of this Cheesy Halloween Breadstick Bones Recipe fool you—each ingredient plays a crucial role in building that perfect cheesy, golden bite. From the soft, stretchy pizza dough to the richness of the butter and the sharp tang of Parmesan, these are pantry staples that come together to make magic happen.
- 1 pound pizza dough: The comforting, tender base that’s easy to work with and puffs up beautifully in the oven.
- All-purpose flour, for dusting: Helps keep the dough from sticking while rolling and shaping.
- 2 tablespoons unsalted butter, melted: Adds a luscious buttery sheen and helps create that irresistibly golden crust.
- ½ cup grated Parmesan cheese: Gives the breadsticks a salty, nutty flavor that complements the mozzarella perfectly.
- 1 cup shredded mozzarella cheese: Melty and creamy, it’s the star cheese that oozes out once baked.
- Marinara sauce, for dipping: A tangy tomato dip that brings a bright, fresh contrast to the rich breadsticks.
How to Make Cheesy Halloween Breadstick Bones Recipe
Step 1: Preheat Oven & Prepare Sheets
Start by setting your oven to 375°F (190°C) so it’s nice and hot when the breadsticks are ready to bake. Line two large baking sheets with parchment paper to ensure the breadsticks won’t stick and for easy cleanup later.
Step 2: Prepare Cheese Filling
In a medium bowl, combine the shredded mozzarella and grated Parmesan cheese. This blend creates a wonderful texture and flavor combo that melts beautifully and adds a savory punch every time.
Step 3: Roll & Cut Dough
Lightly dust your work surface with flour to prevent sticking, then roll out your pizza dough into a rectangle about 12 by 16 inches. Use a sharp knife or pizza cutter to slice the dough into 12 to 16 strips, approximately 1 to 1.5 inches wide. This size will make the perfect finger food!
Step 4: Fill & Seal Breadsticks
Spoon 1½ to 2 tablespoons of your cheesy mixture onto one half of each strip. Carefully fold the other half of the dough over the cheese, then pinch the edges tightly. This step is so important because it keeps all that gooey cheese from leaking out during baking.
Step 5: Shape into Bones
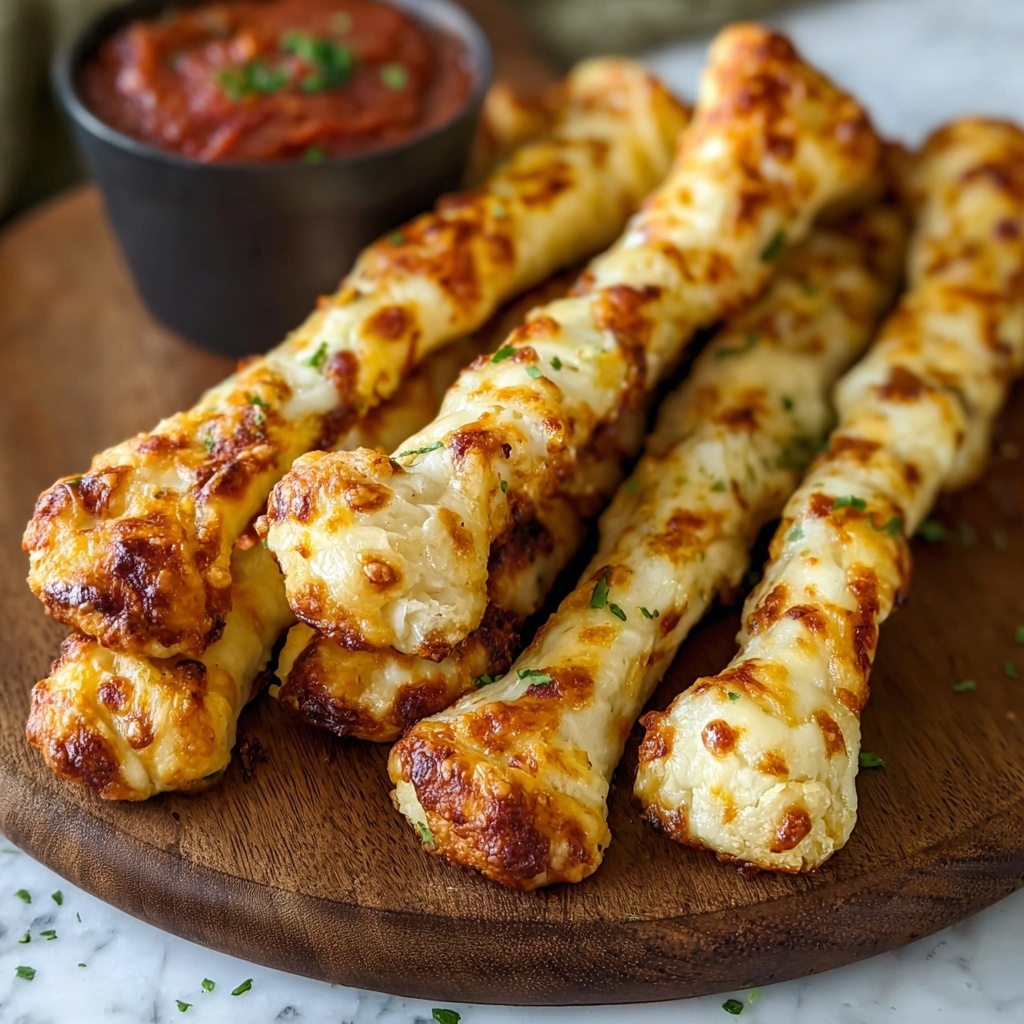
Gently roll the sealed strips into cylinders that are about 6 to 8 inches long. Now, here’s the really fun part—use your fingers to pinch and form two “knuckles” at each end of the cylinder with a thinner “shaft” in the middle, perfectly mimicking a spooky bone shape. Place each shaped breadstick on your prepared sheets, spacing them 1-2 inches apart so they bake evenly.
Step 6: Brush & Bake
Lightly brush the tops of your bone-shaped breadsticks with the melted butter. This will help them get that irresistible golden color and add extra flavor. Bake in the oven for 18 to 22 minutes, rotating the baking sheets halfway through to ensure even baking. You want them puffed and golden—just like a delicious Halloween treat!
Step 7: Serve
As soon as they come out of the oven, brush the bones once more with any remaining melted butter for a beautiful shiny finish. Serve these warm with a side of marinara sauce for dipping—the tangy tomato sauce is the perfect partner to the cheesy richness.
Step 8: Storage
If you have any leftovers, store them in an airtight container at room temperature for up to 2 days. To enjoy them later, simply reheat in a 350°F (175°C) oven for 5 to 7 minutes to bring back their fresh-baked magic.
How to Serve Cheesy Halloween Breadstick Bones Recipe

Garnishes
For an extra pop of color and flavor, sprinkle some fresh chopped parsley or a pinch of Italian seasoning over the breadsticks just before serving. Adding a little garlic powder to the melted butter before brushing also makes the aroma irresistible and adds a subtle kick.
Side Dishes
These cheesy bone breadsticks pair wonderfully with classic marinara sauce, but you can get creative and also offer ranch dressing or a spicy arrabbiata dip for those who like a little heat. Pairing them with a crisp green salad or some roasted veggies balances out the meal, especially for a party spread.
Creative Ways to Present
For a truly festive touch, arrange the breadstick bones on a dark serving tray or slate platter to make them pop visually. You can scatter some edible “spooky” garnishes like plastic spiders or baby skeleton figures around the tray to amp up the Halloween vibes. Wrapping them in parchment paper tied with twine makes for a cute grab-and-go snack for kids.
Make Ahead and Storage
Storing Leftovers
Leftover Cheesy Halloween Breadstick Bones can stay fresh for up to 2 days when kept in an airtight container at room temperature. Be sure to let them cool completely before storing to avoid condensation that could make the breadsticks soggy.
Freezing
You can freeze the prepared but unbaked breadstick bones by placing them on a baking sheet lined with parchment and freezing until firm. Then transfer them to a freezer-safe container or bag. When ready to bake, just pop them straight from the freezer into the oven—adding a few extra minutes to the baking time.
Reheating
To reheat, place your leftover breadstick bones in a preheated 350°F (175°C) oven for 5 to 7 minutes until warmed through and crispy again. Avoid microwaving, as it will make the crust soft and chewy instead of maintaining that perfect golden crunch.
FAQs
Can I use store-bought pizza dough for this recipe?
Absolutely! Store-bought pizza dough works wonderfully and makes this Cheesy Halloween Breadstick Bones Recipe quick and easy to pull together without sacrificing flavor or texture.
What cheeses work best besides mozzarella and Parmesan?
While mozzarella and Parmesan are classic, you can experiment with sharp cheddar or a blend of Italian cheeses for unique flavor twists. Just make sure the cheese you use melts well.
How do I make sure the cheese doesn’t leak out during baking?
Pinching the edges of the dough very firmly and sealing well is key. You can also lightly press the edges with a little water before sealing if the dough feels dry.
Can I make these gluten-free?
Yes, by using a gluten-free pizza dough alternative, you can keep the fun and flavor of this Cheesy Halloween Breadstick Bones Recipe while accommodating gluten sensitivities.
What if I want to make them spicier?
Add a pinch of red pepper flakes to the cheese filling or brush the breadsticks with a mix of melted butter and cayenne pepper for a subtle heat that’ll surprise your guests.
Final Thoughts
There’s something undeniably fun about the Cheesy Halloween Breadstick Bones Recipe that makes it a perfect addition to any spooky celebration or casual snack time. It’s simple enough for everyone to enjoy, yet whimsical enough to impress your guests. So grab your pizza dough, gather some cheese, and get ready to bake up a batch of Halloween magic. Your taste buds—and your party guests—will thank you!
Print
Cheesy Halloween Breadstick Bones Recipe
- Prep Time: 15 minutes
- Cook Time: 20 minutes
- Total Time: 50 minutes
- Yield: 16 breadstick bones
- Category: Appetizer
- Method: Baking
- Cuisine: American
Description
These Cheesy Halloween Breadstick Bones are a fun and festive twist on classic breadsticks, filled with gooey mozzarella and Parmesan cheese, shaped like spooky bones, and baked until golden and delicious. Perfect as a party appetizer or snack, served warm with marinara sauce for dipping.
Ingredients
Dough
- 1 pound pizza dough
- All-purpose flour, for dusting
Cheese Filling
- ½ cup grated Parmesan cheese
- 1 cup shredded mozzarella cheese
Topping
- 2 tablespoons unsalted butter, melted
Serving
- Marinara sauce, for dipping
Instructions
- Preheat Oven & Prepare Sheets: Preheat the oven to 375°F (190°C). Line two large baking sheets with parchment paper to prevent sticking and ensure easy cleanup.
- Prepare Cheese Filling: In a medium bowl, combine the shredded mozzarella and grated Parmesan cheese thoroughly to create the cheesy filling for the breadsticks.
- Roll & Cut Dough: On a lightly floured surface, roll out the pizza dough into a rectangle approximately 12 by 16 inches. Cut the dough into 12 to 16 strips, each about 1 to 1.5 inches wide, for individual breadsticks.
- Fill & Seal Breadsticks: Spoon about 1½ to 2 tablespoons of the cheese mixture onto one half of each dough strip. Fold the other half of the dough over the cheese, then firmly pinch the edges to seal the filling completely inside.
- Shape into Bones: Gently roll each sealed dough strip into a cylindrical shape about 6 to 8 inches long. Use your fingers to pinch and indent both ends creating two ‘knuckles’ and a thinner ‘shaft’ in the center, resembling a bone shape. Place the formed breadstick bones on the prepared baking sheets, spaced 1 to 2 inches apart.
- Brush & Bake: Lightly brush the tops of the breadstick bones with melted unsalted butter. Bake for 18 to 22 minutes, rotating the baking sheets halfway through, until the breadsticks are golden brown and puffed.
- Serve: Remove from the oven and, while still warm, brush the breadsticks with any remaining melted butter. Serve immediately with your favorite marinara sauce for dipping.
- Storage: Store any leftovers in an airtight container at room temperature for up to 2 days. Reheat in a 350°F (175°C) oven for 5 to 7 minutes for best results.
Notes
- Lightly flouring the surface prevents dough from sticking while rolling.
- Make sure to seal the edges firmly to avoid cheese leakage during baking.
- Use fresh, good-quality cheese for best flavor and meltiness.
- Adjust baking time depending on your oven’s heat distribution for perfect golden crust.
- Serving warm enhances the gooey cheese experience.
- Can be made ahead and reheated just before serving.


